 |
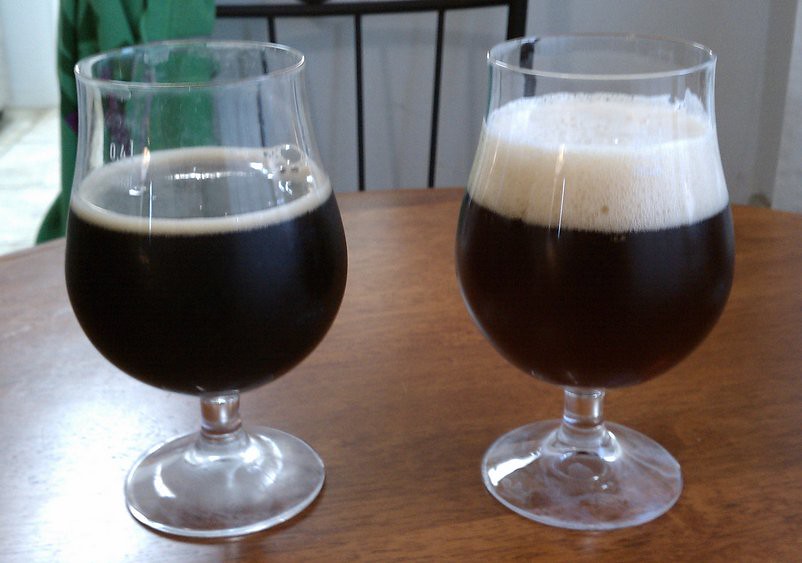
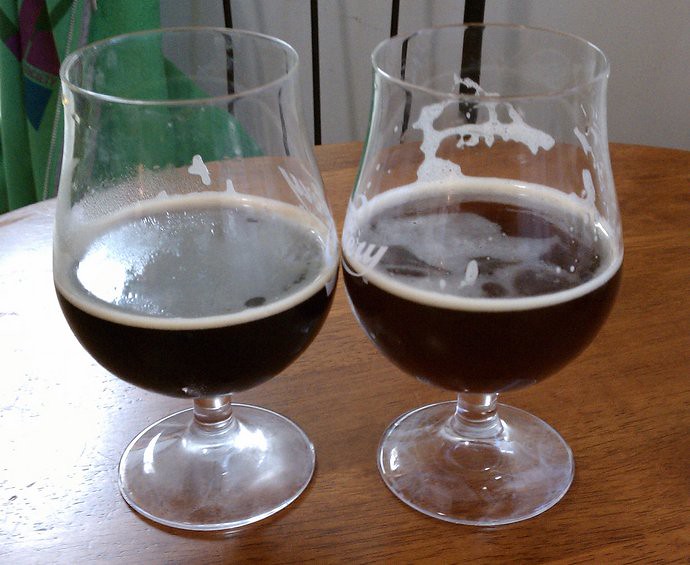
| Same grain, different levels of hops |
If you go back to the original post on
StarRaptor you'll see that it started out as a collaboration brew on the Mr Beer Forums between myself and a fellow brewer out in Minnesota named Chris (mnstarzz13).
The process itself is everything I love about a collaboration which in the end produced two very different beers. Essentially we arrived at a central grain bill which each of us spun to their own taste. For me this meant increasing the IBUs and adding some dry hops while Chris backed off the hops and created a much more malty beer. I also subbed the Amarillo for Citra which is something I will not do again if Simcoe is involved. As far as yeast went he used Wyeast's 1056 (which is the same strain as WLP001 and US-05) and I used San Diego Super Yeast (WLP090) which is described as supercharged WLP001, so pretty similar strains.
There was also a slight variation in equipment and techniques. The two that stood out for me was secondary vs non-secondary and keg vs bottle conditioned. Beyond those we both used a yeast starter, added yeast nutrient, included whirlfloc, controlled fermentation temperatures and aerated the wort (whip vs pure O2).
Chris's Imperial Red
 |
| Nice, dark garnet color |
Appearance: Pours a dark garnet color into a Bruery tulip glass. It appears slightly hazy as I shine a light through it but it is overall pretty clear for a bottle conditioned beer. I poured it almost straight down and had issues generating head, however when I swirl it I'm able to form a nice 3/4 inch head of tan fluffy foam. It's a lot darker then StarRaptor and when I shine a light behind it very little makes it through. Generates good lacing as I imbibe
Aroma: I'm picking up some slight wood, almost oak, notes. I don't know where this is coming from. It's very light on the hops coming across with a rich malty aroma. When I breath in deep I get a slight fussel alcohol aroma.
Mouthfeel: Good level of carbonation with small tight bubbles. Medium bodied with almost a rich think malty mouthfeel.
Taste: Very malty reminds me a little of an strong Irish red. I can narrowly pick up the taste of the alcohol but it's very minor. Overall it a smooth rich malty beer and when I look at it that was it is very drinkable. There is very little hop bitterness as it is very malty.
Overall: This is a solid beer. I feel it could have benefited with some time in secondary and perhaps some pure O2 at time of pitch. It has a very familiar taste that I can't seem to place
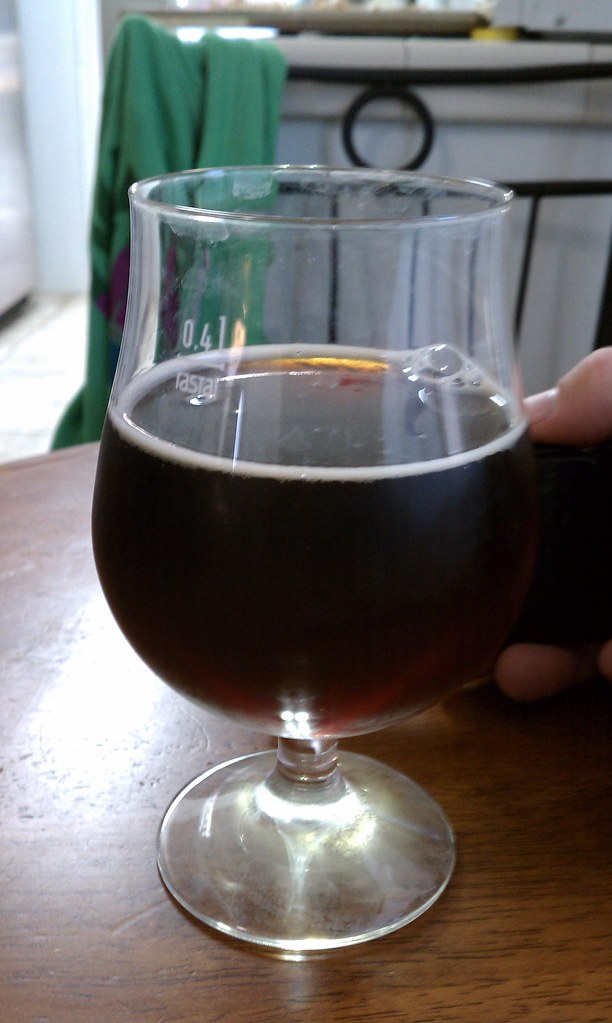
StarRaptor
 |
| I love the color and the glow |
Appearance: Poured crystal red from the tap into Bruery tulip glass with an inch of off white almost egg shell head. I'm actually pretty pleased and surprised by how clear it is. It's gone back and forth in the clarity department but seems to have leveled off pretty clear. Solid lacing as the level goes down. Shining a light behind it generates a beautiful red glow.
Aroma: Predominately citrus with some pine notes. The Citra really stands out in the aroma, I just wish it played better in the flavor department. It's been on draft for a while now I while the hops are still coming through it's days are numbered.
Mouthfeel: Light and crisp with OK carbonation considering the issues I'd recently had that flattened the keg. In fact I had only re-carbonated it a couple of days prior. I would consider it a light to medium bodied beer.
Taste: It seems to be improving and it very drinkable right now with nice citrus hop flavor. I don't know how much longer this beer has before it completely fall apart though. I don't think the hops are playing well and will avoid the Simcoe Citra combination in the future.
Overall: The most difficult thing about drinking this beer is shaking the memory of how it tasted when I was moving it to secondary. It was absolutely brilliant and felt I had nailed a recipe. Since coming out of secondary it has never lived up to that tasting. Having had a few Simcoe Citra beers at this point I can say I don't like how they play together which is odd as Falconer's Flight is a hop blend of Simcoe, Citra and one other and I loved it in
Costa del Sol. I might play with this recipe and rebrew it in the future minus the Simcoe and I enjoy the Citra aroma it still has.
 |
| Cheers! |
I really enjoy experiments and collaborations like this. I find the ability to create multiple beers from a central batch of wort fascinating. The ability to take a grain bill and hop or add DME it to taste, in my opinion, really let's the individuality of the brewer shine through even more then when you just use different yeasts. I hope to do more of these split wort collaborations in the future.
Cheers
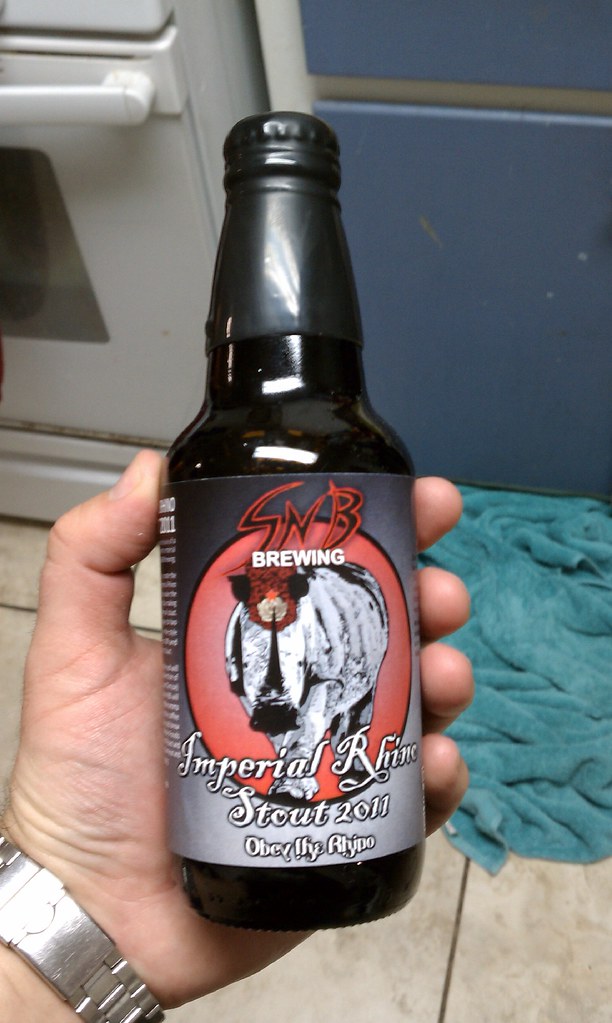
SNB