Header Image

Showing posts with label The Mad Fermentationist. Show all posts

Friday, February 10, 2012

Brewing Beers with Big Hop Aroma

One of my favorite charts illustrating the various hop additions
One of my favorite things about a good IPA is the burst of citrus/pine aroma I get when I take a deep sniff.  In brewing there are several time periods to add hops to the boil, each having it's own function. The classics are Bittering (over 60 minutes), Flavor (20-30 minutes), Aroma (0-5 minutes) and the mother of all aroma Dry Hopping.

Dry hopping is generally done in secondary fermentation and there is some logic behind this.  The first bit is that active fermentation can be quite aggressive and literally eject a lot of the hop aroma out the airlock.  The next bit has to do with maximizing the surface area of the hops exposed to the beer by eliminating anything that is not beer ie the left over yeast.

In line shot of dry hopping
When it comes to dry hopping lengths opinions very depending on who you ask as it's a topic that is up for debate.  Generally for warm fermented beers I prefer to keep the length of dry hopping to 1-2 weeks and for cold fermented beers a little longer 3-4 weeks.  This is how I actually come up with the BIG IPL dry hopping scale.  I was following the BIG IPA recipe and had dry hopped in secondary.  The beer was a long way from being completed and I was nervous that if I left it on the dry hops for too long it would pick up some grassy flavor.  I therefore decided to move it to a tertiary vessel with additional dry hops using hops I just happened to have left over from it's brewday.  

Moving beer from one dry hop to the next is not so unique, for instance when Mike over at the Mad Fermentationist posted the recipe for his version of Pliny the Younger he included the dry hop schedule straight from Vinnie Cilurzo himself.  Vinnie strongly believes in getting his hoppy beers off of the dry hops as soon as they have fulfilled their purpose and for Younger he dry hops a total for 4 times post primary.
DH 1 Simcoe, Amarillo, Centennial for one week and remove
DH 2 Amarillo, Centennial for one week and remove
DH 3 Simcoe for one week and remove
DH 4 Simcoe, Amarillo Dry Hop in Keg
The Ultimate Hop Chart by Zeke Shore
Buy it at Hopschart.com
When adding dry hops I prefer to put them in first and rack the beer on top of the hops.  I have done it both ways and been please with both results.  I've have occasionally been known to forget to add hops during the initial transfer and add them later.  When brewing Costa del Sol I move the beer to secondary clean and only dry hop a week or two before I keg.

When selecting dry hops I look to the aroma descriptors via Hop Union or other online sources.  I will admit that I was much more experimental when I first started brewing and played around with a lot of different hops.  These days I know what I like and have really narrowed my hop varieties down to a handful, especially when it comes to dry hopping.  My favorite hops to dry hop with are all pretty classic dry hopping hops.  Amarillo (apricots and peaches), Cascade (floral and citrus), Centennial (fruity), Columbus (dank, onion, garlic, spice), Citra (passion fruit, grapefruit) and Simcoe (pine).  I think Amarillo and Simcoe make an outstanding pair not only in dry hopping but throughout the process.  Citra is another excellent aroma hop that goes great in IPA, I've not had luck in pairing it with Simcoe but it's a good partner for Cascade, Centennial, Columbus and Summit.

One thing to look at when brewing a big hoppy beer is the Cohumulone (one of the two primary alpha acids in hops). Low Cohumulone levels in a hop leads to a more smooth bittering.

I'll reiterate something I mentioned in a previous post on secondary and tertiary transfers. Prior to transferring I flush the carboy with CO2 from my keezer prior to filling it.  This is especially important when it comes to hoppy beers as the CO2 flush reduces oxidation preserving a fresher hop character.

Cheers

-SNB

Tuesday, February 7, 2012

Temperature Control

I recently put together a presentation for the AHP Brewclub at Addison Homebrew Provisions on the benefits of temperature control on fermentation.  This is the core of that presentation with some minor changes

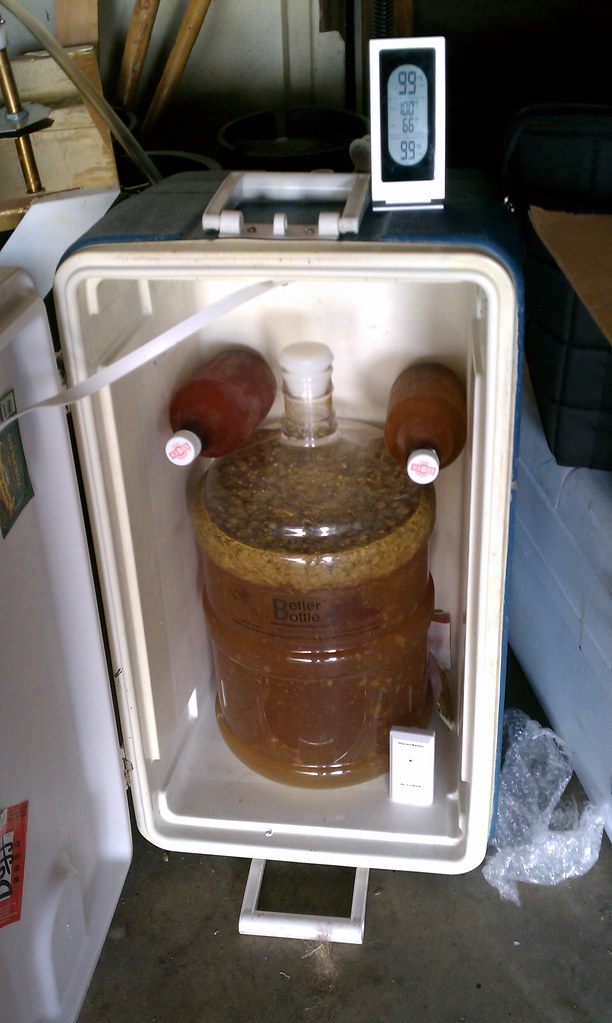
The Inside of my Fermenting Cube
A recent reader poll on the Mad Fermentationist found the most important investment brewers could make is Fermentation Temp Control. I definitely agree that it is one of the best investments I have made in brewing.  Let’s face it yeast like a nice stable environment to do its job and when it’s not happy it will let you know in both off flavors and aromas.

Here’s a quick list of issues that can occur without controlling temperature (sourced from How to Brew).
Alcoholic:  Overpowering alcohol flavor, bitter, acetone, paint thinner, spicy, sharp, undesirable
“hot” sensation in the throat fermenting at temperatures exceeding 80ºF

Estery/Fruity:  Fruit, especially banana, to a lesser extent, pear, strawberry, raspberry, grapefruit. Fermenting over 75ºF has been shown to drastically increase these esters.

Solvent-like:  This group of flavors is very similar to the alcohol and ester flavors, but are harsher to the tongue. These flavors often result from a combination of high fermentation temperatures and oxidation
Temperature control also allows a brewer to have the ability to brew what they want when they want, ie ales in the winter, lagers in the summer. I like to do a lot of lager beers and without the use of my converted deep freeze I wouldn't have the range and accuracy I want to brew them to the standards I want. 

What are we trying to control?

A Poor Man's Fridge
Before we move forward we need to understand what we are trying to control; the environment temperature (ambient room temperature) or the temperature of the fermenting beer.  For the most part we are going to be trying to control the temperature of the fermenting beer but adjusting the temperature of its environment.  Active fermentation can cause the beer to be 5-10 degrees warmer than its surrounding environment.   There are a few ways in which we monitor this.
1) Crystal Thermometer – Similar to one you would find on a fish tank this measures the temperature of the liquid it is attached to.  AHP carries ones specifically for beer that measures into the lager range.

2) Thermowells + Thermometer – Typically these are stainless tubes built into stopper bungs that always you to take a center of the liquid temperature method but inserting a thermometer into the tube.    Certain types for temperature controllers can have their probe inserted into the thermowell allowing you to control the liquid temperature instead of the environmental temperature.

3) Infrared Thermometer – A small hand held device that takes the surface temperature of the object scanned.

In all these cases (except when using a temperature controller inside a thermowell) you are taking the temperature of the fermenting beer with the understanding that you will be adjusting the temperature of the control up or down to reach the desired fermenting temperature

Tuesday, January 31, 2012

Westbennetteren 12

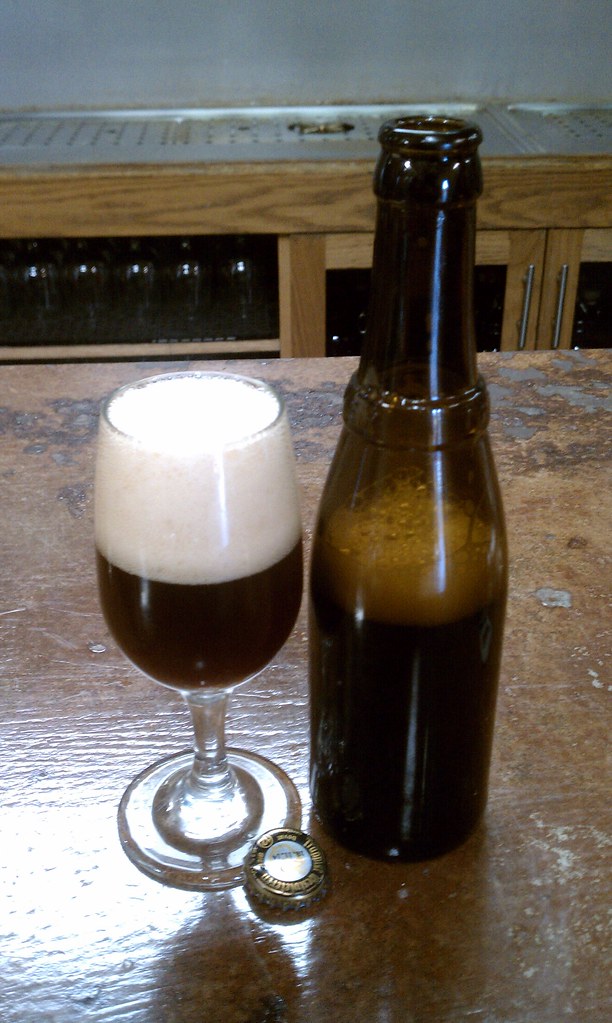
The main inspiration Westvleteren 12
Thanks Kevin (kbm)
I've been toying around with the idea of brewing a Belgian nah Trappist-style quad since I first tried Shawn's. It was a pretty eye opening experience for me.  I was still under an anti-Belgian-style beer kick due largely to my own lack of understanding of what it meant to be a Belgian-style beer and the wide scope that one label was being applied.  Shawn's quad was fantastic and made me long to try the ultimate examples of the the style Westvleteren 12.

That day came during my late night beer session for My Funky Brother Brett (which is tasting awesome right now).  We'd had a really good night of brewing and beer so on a whim I decide to open a bottle I'd been saving for several months to share with Rick and Daniel.   Few beers have lived fully up to the hype that surrounds them, this one did.

Daniel then became inspired to brew his own version for his 2012 Anarchy Ale called Westy Southwest.  He even made his own candi syrup for it which is really cool. I think Daniel taking the quad plunge was the last bit of inspiration I needed to just go for it and hop on the Quadwagon, Shawn had also recently rebrewed his quad.

The ingredients
The inspiration for the recipe came straight from the supplier of the candi syrup I used Candi Syrup Inc. I'd come across them while reading a post on The Mad Fermentationist.  They're a US producer of candi syrups that got into manufacturing them in part to nail a Westvleteren 12 clone.  They have a lot of great looking recipes on their site including one for Westvleteren 12.  Reviewing the recipe against Daniel's and others I'd found online made the decision to go with it as the basis a no brainer.  The only changes I made was to drop a pound of the D-180 and replace it with a pound of the D-90.  I did this after reading the second page of the recipe where they talk about the process of creating the recipe and mention using D-90 and D-180 together.  The other change was a minor hop swap.

Again the main issue was finding a time to brew it.  I've been training for a half marathon and have been doing my long runs on Sundays.  On Saturday I take my daughter to Little Gym mid-morning which places a damper on my brew schedule.  To make it even more complicated my wife was also training for a half marathon and ran the Tinker Bell Half the weekend I brewed.

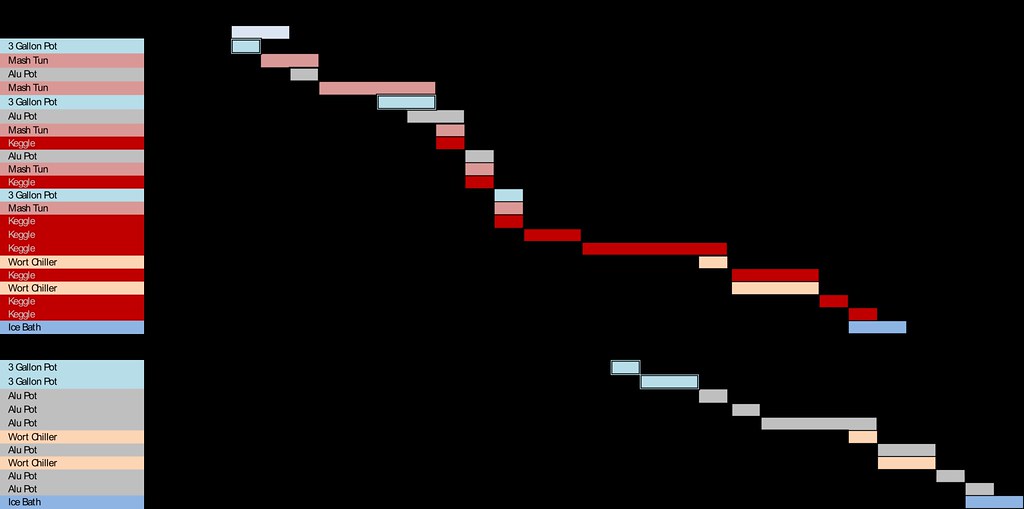
The solution I came up with was to use the mash time in my favor and brew on Saturday.  Having mapped out my brewday for the Double BIG IPL brewday back in December I knew when I would have to have the mashing going so I could take Syd to Little Gym.  From there it was a simple matter of working backwards.  

I borrowed some equipment from my buddy Marshall
to make brewing the second beer faster/easier
Par for my course as of late I was under OG despite taking a preboil gravity reading and using BeerSmith 2 to correct for temperature. I'm getting frustrated and might buy a temperature correcting refractometer. I'm following BeerSmith 2 instructions and have loaded my Keggle setup into for equipment. For the quad it wasn't the end of the world (-6 points) and nowhere near infuriating as the second running beer I'll talk about on Thursday.

I started the fermentation at 65 overnight and have been slowly ramping up towards the 80s.  I'll probably peak at 82 on Wednesday then start to lower back to 67F for 5 days before racking to secondary when the gravity hits 1.012.  Then it will be into the cellar at 50 for a couple of months.  Yes, I will be bottle conditioning this bad boy and plan on using Candi Syrup Inc's Simplicity to prime it with. I might even harvest some actual Westvleteren 12 bottle yeast for bottling.

Cheers

-SNB

Tuesday, January 10, 2012

33

Happy Birthday to me!
As long as I've been working I've always set out to not work on my birthday, it just doesn't seem right to me. This year however I felt that it would be fun to spend 6 hours brewing, which is technically working but not to the same level.  I think it's really telling about how much I enjoy brewing when it's something I want to do on days I set aside doing nothing.

When I set out to craft the recipe for my birthday brew I had a couple of thoughts in mind.  I wanted it to be big with agability, nothing below 10%.  This opened the doors to Imperial Stouts, Old Ales, Barley Wines and American Strong Ales.  I also had a bunch of oak chips and cubes that have been sitting on various spirits since summer that I wanted to play with.  My plan would be to brew it on my birthday, ferment it and bulk condition till July, then age it in 1/2 - 1 gallon growlers on the various oaks till December when I'll blend it back together and keg it.  I'll enjoy the first glass on my next birthday when I finish up brewing next years batch.  

I spent a lot of time reading various recipes online, in various magazines (BYO, Zymurgy etc) and in my books but nothing seemed to be jumping out at me.  The previous year I'd toyed around with brewing an anniversary beer based on Stone's Double Bastard but decided I really wanted a stout as I really like how Imperial Rhino Stout came out. 

The Grain Landscape
On my way back from Houston I happened to catch Mike's (the Mad Fermentationist) tasting notes on his Kate the Great clone.  Apparently Todd Mott, Portsmouth's head brewer, sent a brewer a clone recipe for his infamious stout who then posted the recipe up onto Homebrewtalk. After reading through the couple dozen pages and the various versions it produced (including Mike's) I decided that I had found my recipe.

The next obstacle would be to determine how I would brew it.  I really wanted to do it all grain for several reason however I ran into a slight problem as my mash tun won't be able to hold the shear volume of grain that would be require for a 5 gallon batch. If you ever wonder about that check out this link. I therefore decided to sub-out part of the two row for 3 lbs of light DME.

When it came to my birthday I got a more relaxed start than my last several all grain days, it was my birthday after all.  Bonnie was nice enough to bring me a breakfast sandwich and we set Sydnie up with a table and chair so that all of us could hang out together, which was a great birthday treat for me.  I took a gravity reading after I finished sparging and found I was right on target.  It also happened to be one of the tastiest wort's I've ever produced, so tasty in fact that I poured myself a glass of it to enjoy while I brewed.  

5 Gallons of Stout
The only real issue I had came as I was bringing my pot up to boil.  I noticed that my burner was quieter then it should be and sure enough ran out of gas shortly there after.  It was nothing that a quick run to Home Depot couldn't solve but I really should invest in a backup tank.  The only disappointment came when I took my OG reading, which despite nailing my pre-boil gravity came up 8 points short of target grrrr.

For yeast I used a massive starter that I had put together several days ahead.  I also used a more generous amount of nutrient and hit it with triple the O2 at each oxygenation step. I'll keep it in primary till it get very close to it's target FG then move it to secondary for a while.  I'm really looking forward to this one.

Cheers

-SNB

Tuesday, December 13, 2011

My Funky Brother Brett

During the mash
A few months back I stumbled upon an interesting article on brewing beers fermented 100% with Brettanomyces instead of Saccharomyces. The article featured a couple of names that I've started to become familiar with over the past few months since my first read through.  The biggest take away for me was actually the non-use of aeration. It was an intriguing article so I posted it up to my Brewluminati Facebook group. This generated a lot of good discussion and several of us decided to undertake the challenge.

I decided to brew up a Mo Betta Brett inspired recipe which I'd found on both White Labs and the Mad Fermentationist. I named the beer My Funky Brother Brett after both Brettanomyces and my actual brother Brett. For the strain I went with White Labs WLP645 (Brettanomyces claussenii). Brettanomyces claussenii was discovered at the Carlsberg brewery in 1904 and some of the descriptors that I've read for clean fermentations are fruity with pineapple like aroma. For those who note that Mike (The Mad Fermentationist) is using Brettanomyces anomalus and not Brettanomyces claussenii I'd like to point out that according to Chad Yakobson of The Brettanomyces Project and Crooked Stave in a NHC 2011 presentation B. claussenii has since been reclassified as B. anomalus. So they are scientifically the same strain.

The hardest part was actually finding time to brew it with everything else I had going. Looking at my scheduled Bonnie suggest that I brew it on a Friday night. I've been thinking of doing a late night brew session for a while so I agreed and invited some fellow brewers over to assist and hang out.

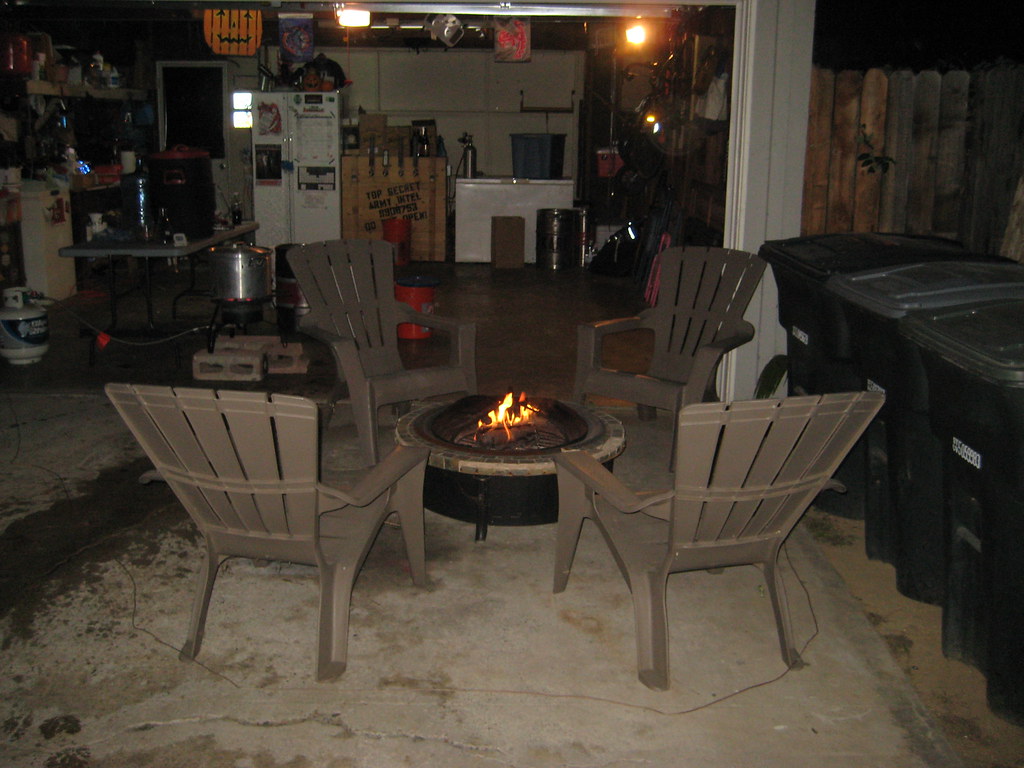
I brought out the fire-pit so people could stay warm
Ive been hovering in the low 60s lately in my efficiency and this was no exception.  For some reason I calculated the efficiency of the recipe at 65% but ended up 4 points under gravity at 1.056 or 60%. I know some people getting 75-80% from batch sparging but that isn't me. I'd love to get it up but for now I just need to start basing recipes off of what I'm really getting not what I wish I was getting.

One note on working with Brettanomyces, because the size of the cell is so small Brettanomyces can hide in the smallest seams or scratches, so if you start to venture this direction you'll want to keep it isolated. I bought a bucket that I intend to use only of brett-based beers and have an old secondary that I will give to the project. In addition I'm going to mark all hoses and siphons that comes in contact with the brett including keg tubing. I didn't do this with Halvtreds as it used a clean primary and will only be soured in bulk aging in a keg.

It's going to be in primary for a while as I've read the strain can take up to 11 days to really get underway.
Cheers

-SNB

Related Posts Plugin for WordPress, Blogger...